
List and table views
Customize columns, group and sort tasks by assignee, priority, status, or date, and apply bulk actions to organize your workflow efficiently
In this article, you'll learn how to use list and table views in awork to manage your tasks efficiently. You'll learn how to switch between views, customize columns, group and sort tasks, and apply various actions to your tasks.
You can choose between list and table views throughout awork, for example in projects and views.
Switching between list and table views
In the toolbar above the task list, you'll find the view options Liste and Tabelle. Click the view you want to switch between list view and the detailed table view.
Grouping and sorting tasks
You can sort and group tasks using the toolbar above your task list. For example, you can group all tasks with the same selection, customer, or user. This makes it easier to organize tasks according to your team's individual workflows.
Adjusting the sort order
Click the sort icon in the toolbar. Under Sortieren nach, you'll find the available sorting options: Aufgabenstatus, Bearbeiter, Erstellt von, Erstellung, Fällig, Geplanter Aufwand, Key, Name, Prio, Start-Datum, Statustyp, Tätigkeit.
Numbers in task names don't automatically determine the order of tasks. They're only taken into account when the Name sorting option is selected.
Changing the grouping
Click the group icon in the top-right toolbar. A dropdown menu opens with the heading "Gruppieren nach". Here, you can choose from several options: Bearbeiter, Erstellt von, Liste, Prio, Statustyp, Tätigkeit, Tageweise/Wochenweise/Monatsweise.
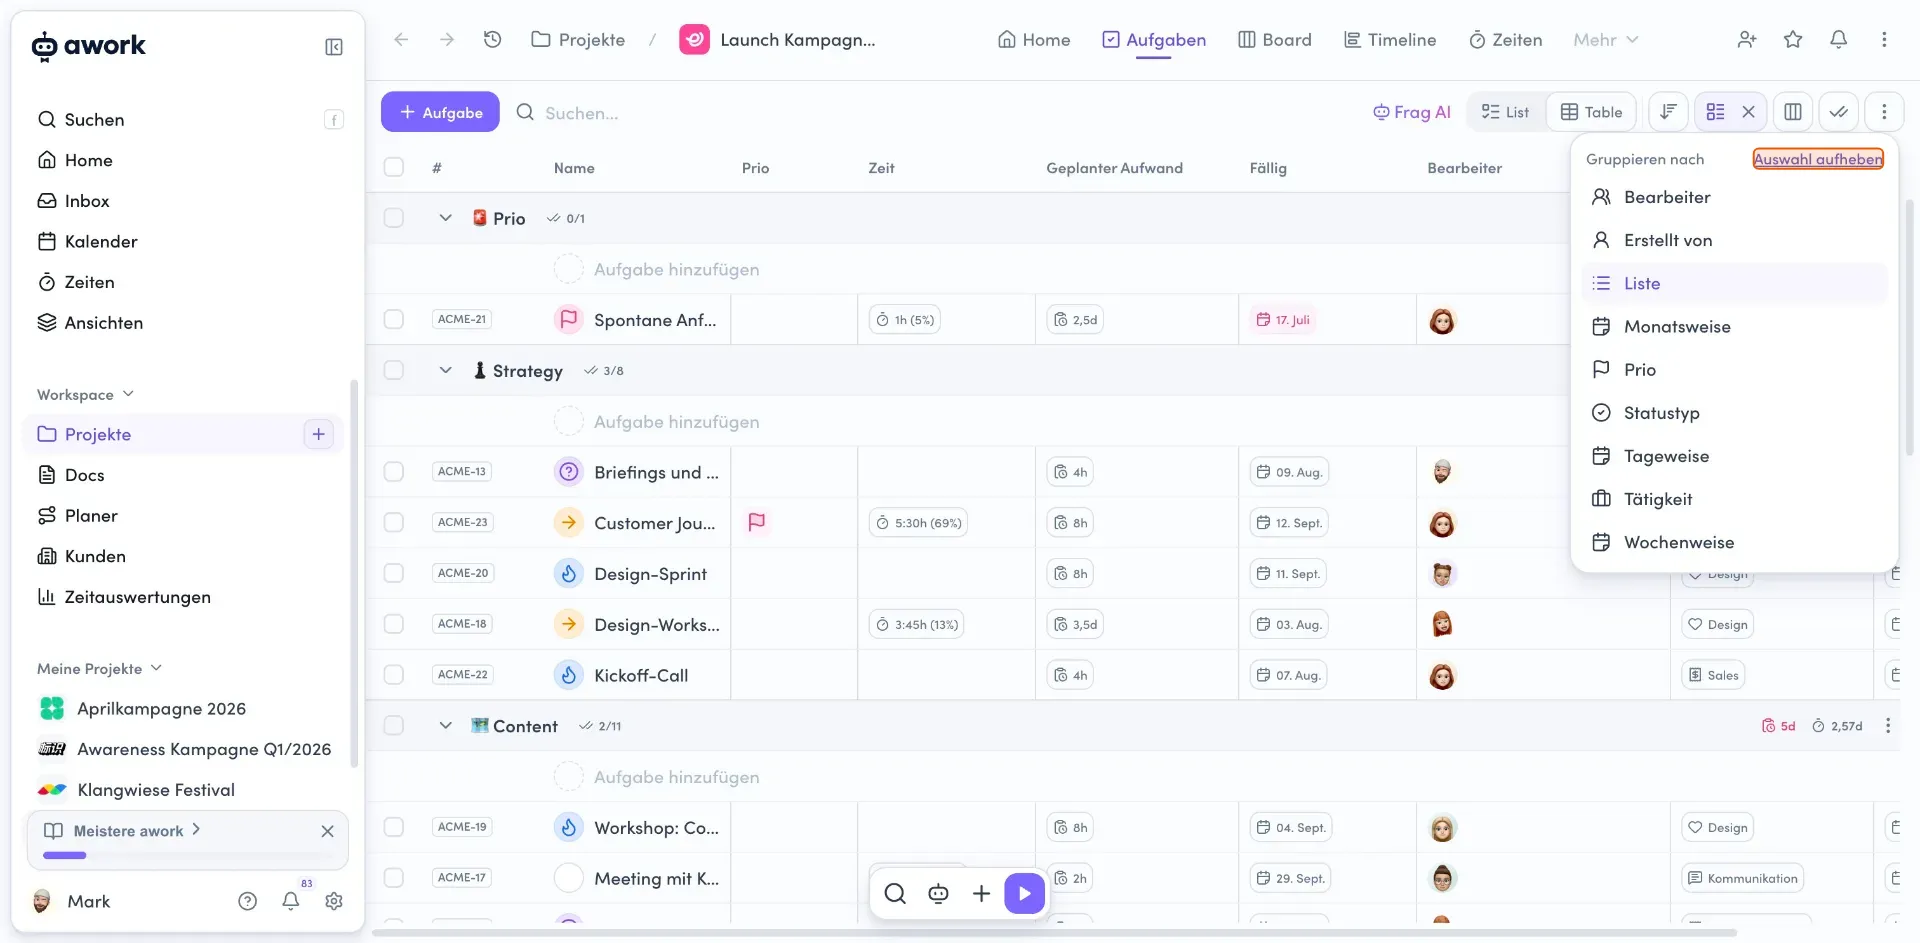
You can also sort and group tasks using custom task fields. All custom task fields that are enabled and supported in the project are available, whether or not you've displayed them as columns in the table view.
👉 Learn more about the supported field types, sorting logic, and special cases in the article Custom fields.
Resetting sorting and grouping
Click Auswahl aufheben at any time to remove an active sort or grouping and return to the original view.
The classic task lists are also a type of grouping. If you remove this grouping, you'll see the individual tasks without lists, sorted chronologically by task key.
Showing or hiding completed tasks
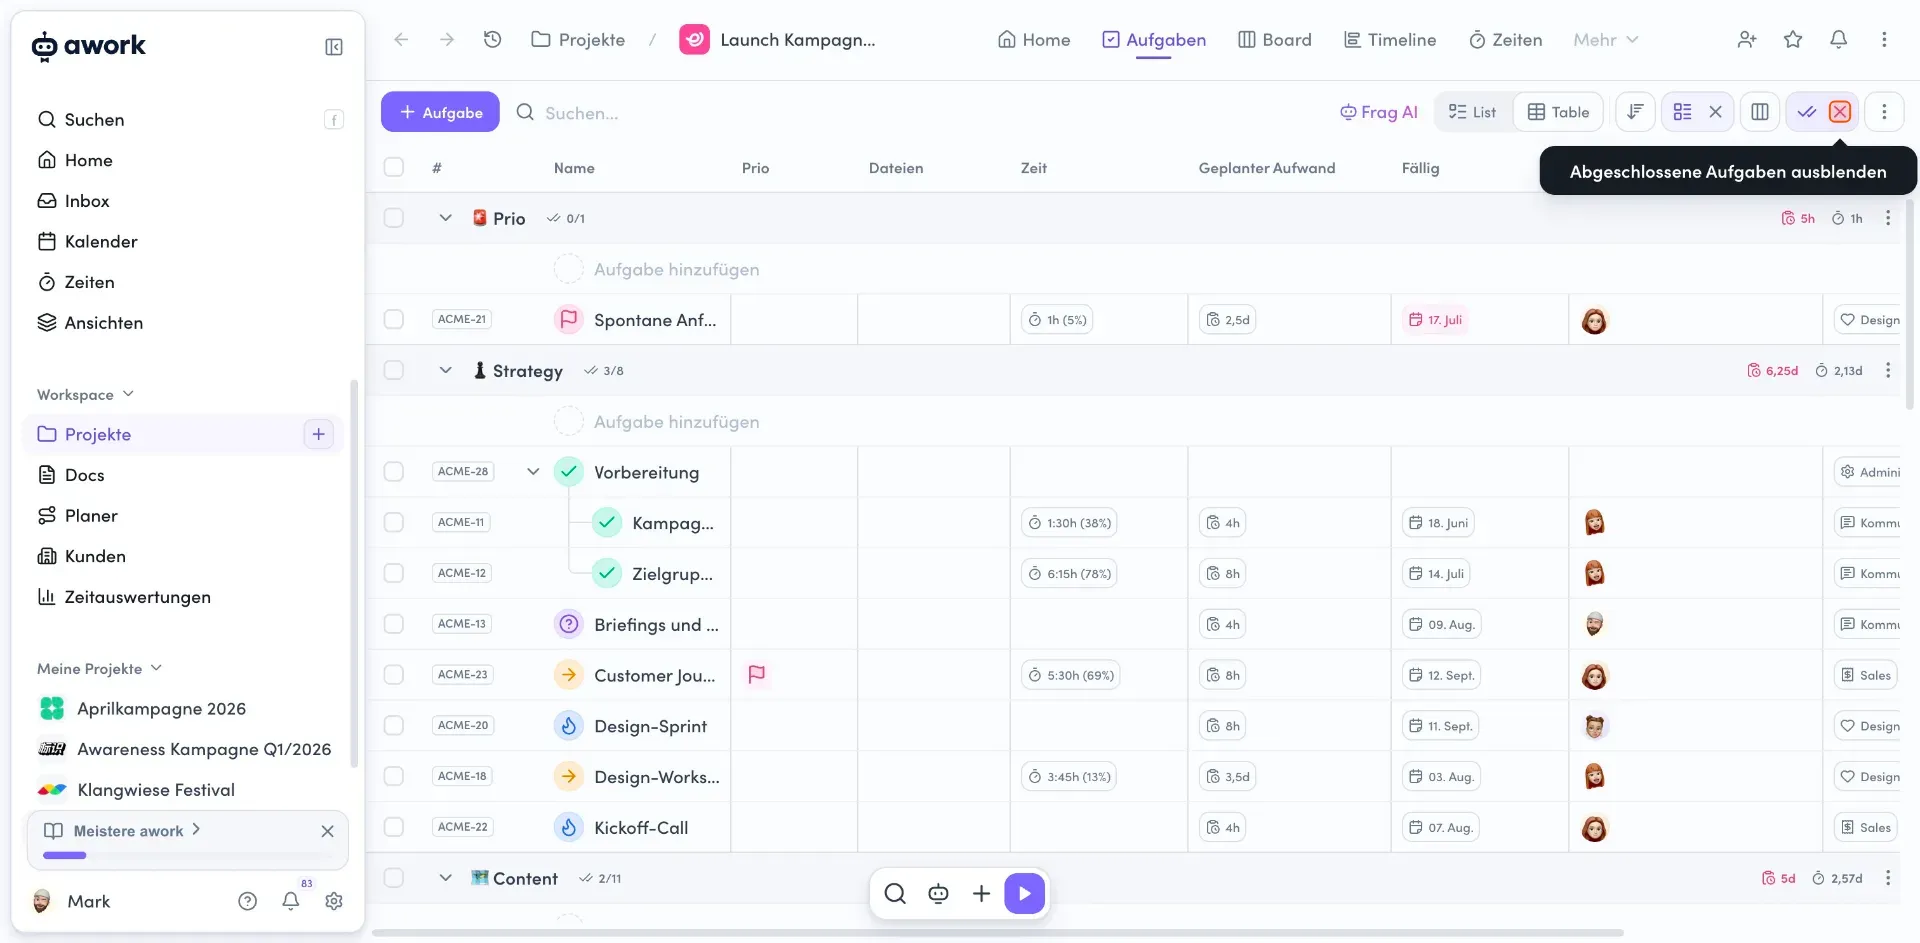
Click the double checkmark icon in the toolbar to show or hide completed tasks. You can choose from 2 options:
- Kürzlich abgeschlossene Aufgaben anzeigen (completed in the last 30 days)
- and Alle anzeigen
Managing task lists
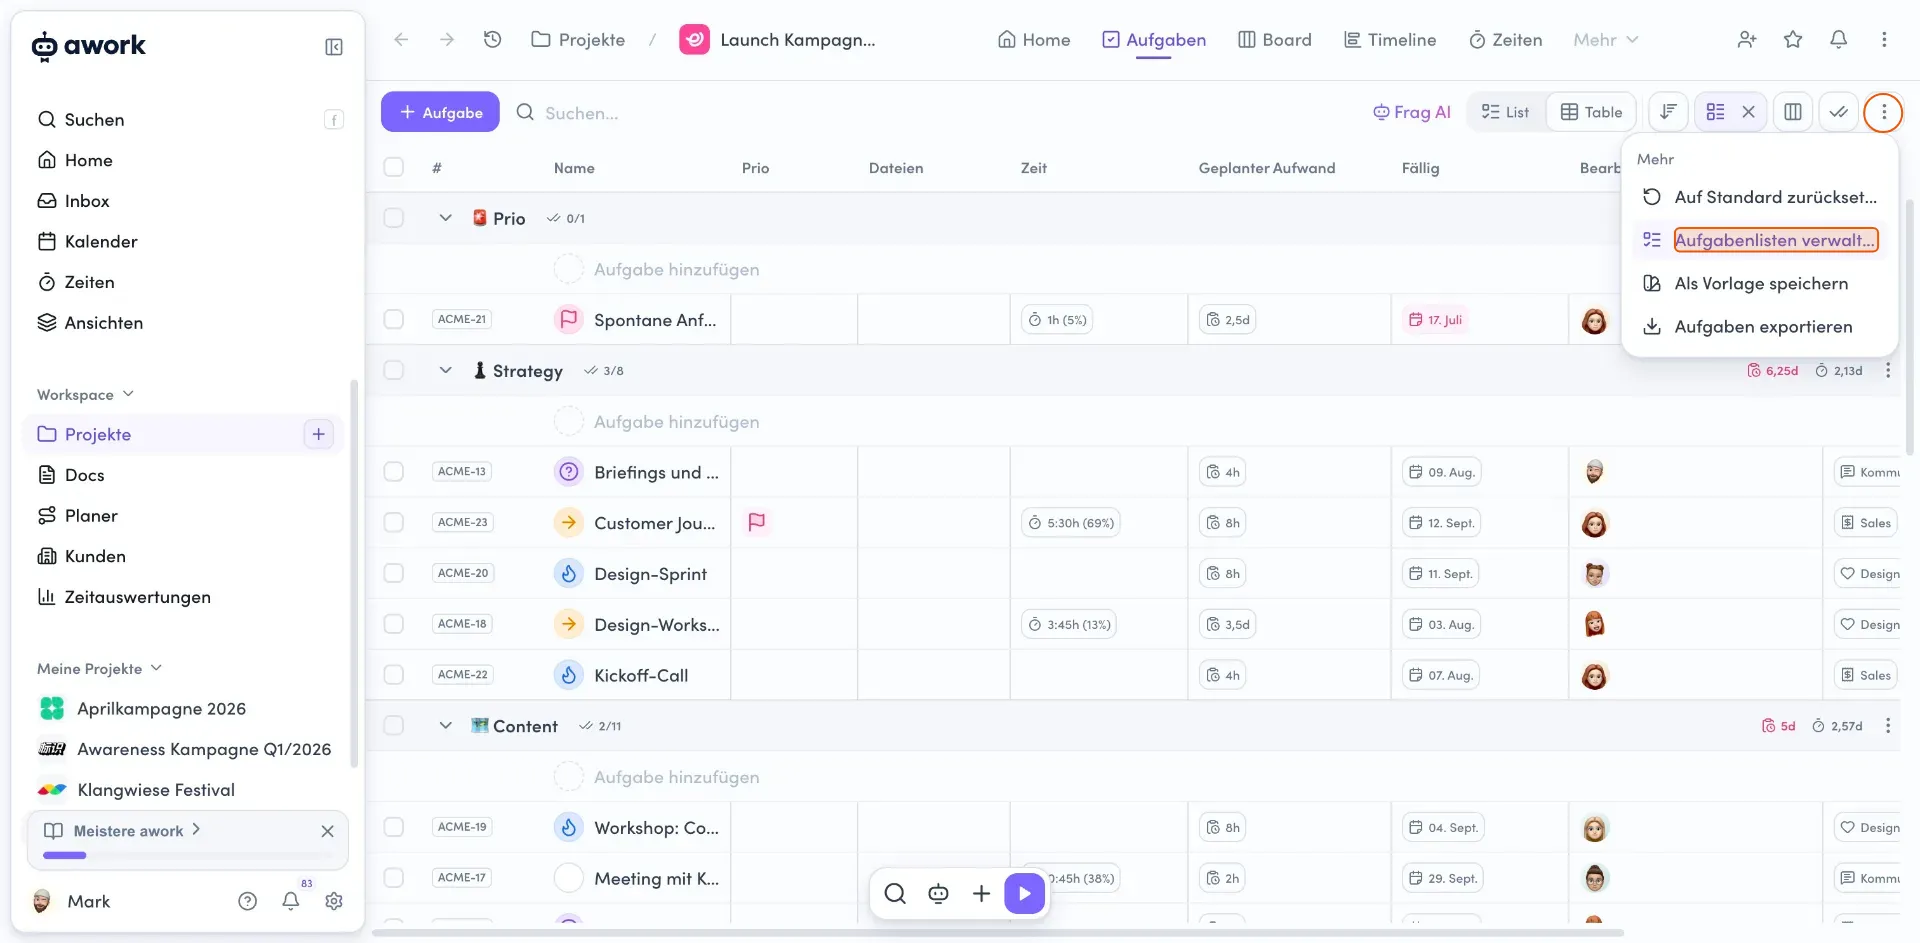
Click the action menu in the top-right corner and select Aufgabenlisten verwalten. A modal window opens, listing all the task lists in the project.
- Reordering task lists
In the management window, you can change the order of the lists using drag and drop. Drag a list by its handle on the left and drop it in the position you want. - Performing list actions
Click the three-dot menu to the right of a list to see more options: archive or delete the task list. Close the window using the Schließen button or the X icon.
Organizing tasks
Creating new tasks
Adding a task
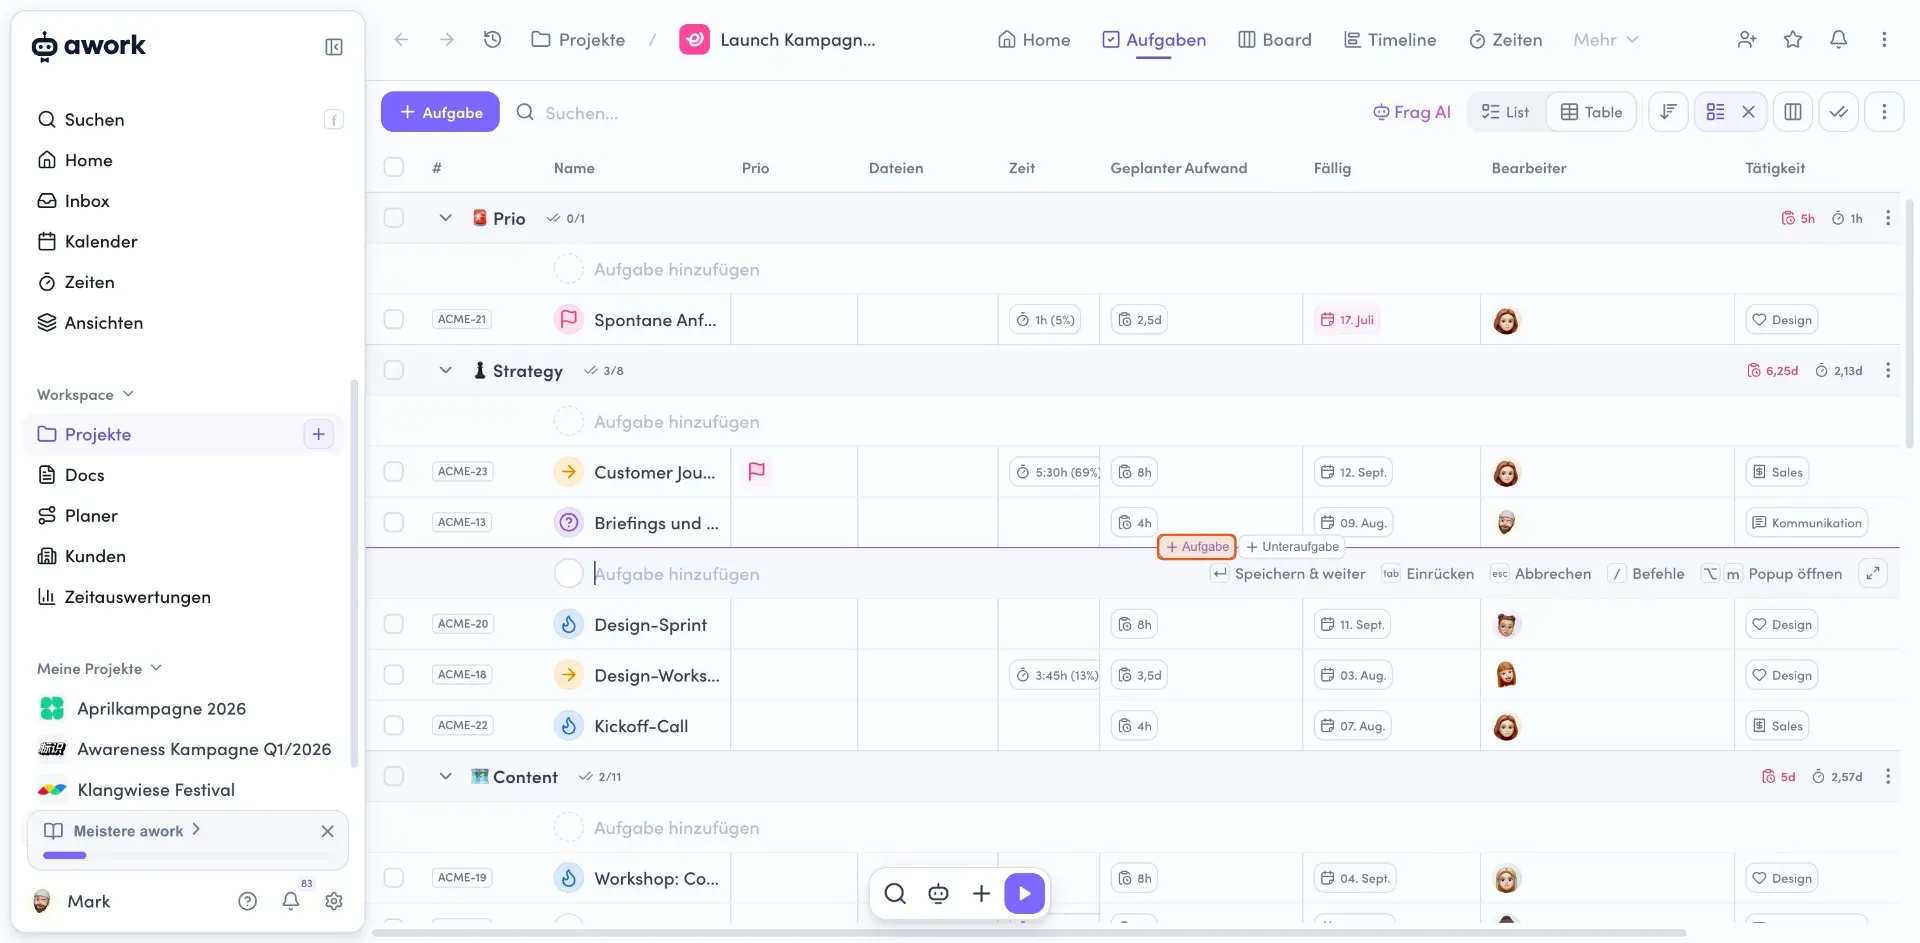
In a task list, click the Aufgabe hinzufügen row or the + Aufgabe button between tasks.
Adding a subtask
Click + Unteraufgabe to create a nested task under an existing task, or drag an existing task to the right using the handle on the left to make it a subtask of another task.
Editing entire hierarchies
When you select a parent task, its subtasks are automatically included.
Manually sorting and moving tasks
Each task is displayed in its own clearly defined row. You can use drag and drop to reorder tasks within a list, move them between lists, or make them subtasks of another task. A colored line shows where the task will be inserted.
The following conditions must be met to move tasks manually:
-
Grouping by list is active, with no custom grouping. When Keine is selected, no task lists are displayed and drag and drop is disabled.
-
No sorting is active.
-
Search is not active.
-
You have permission to edit tasks.
When all these conditions are met, the move handle (the six-dot icon) appears to the left of the task. Use it to move tasks and subtasks with drag and drop.
Actions for task lists
Expanding and collapsing subtasks
Open a task list's action menu and select Unteraufgaben ausklappen or Unteraufgaben einklappen to show or hide all subtasks.
More list actions
The action menu for a task list gives you access to more options:
- Archivieren: Archive the list
- Neue Aufgabenvorlage: Create a template
- Aufgabenliste duplizieren: Copy the list
- Zu Projekt verschieben: Move the list to another project
- Link kopieren: Copy a direct link to the list
- Verbergen für externe User:
- Aufgaben löschen: Delete all tasks in the list
- Aufgabenliste löschen: Remove the entire list
Editing the planned effort
Click the planned effort value for a task list to edit the planned effort for the entire list.
Editing multiple tasks
- Selecting tasks
Click the checkbox on the left edge of a task row to select it. You can select multiple tasks one after another. - Performing bulk actions
When tasks are selected, an action bar appears at the bottom of the screen. It shows the number of selected tasks, for example, "2 selected", and offers various actions in the action menu (the horizontal three-dot icon):
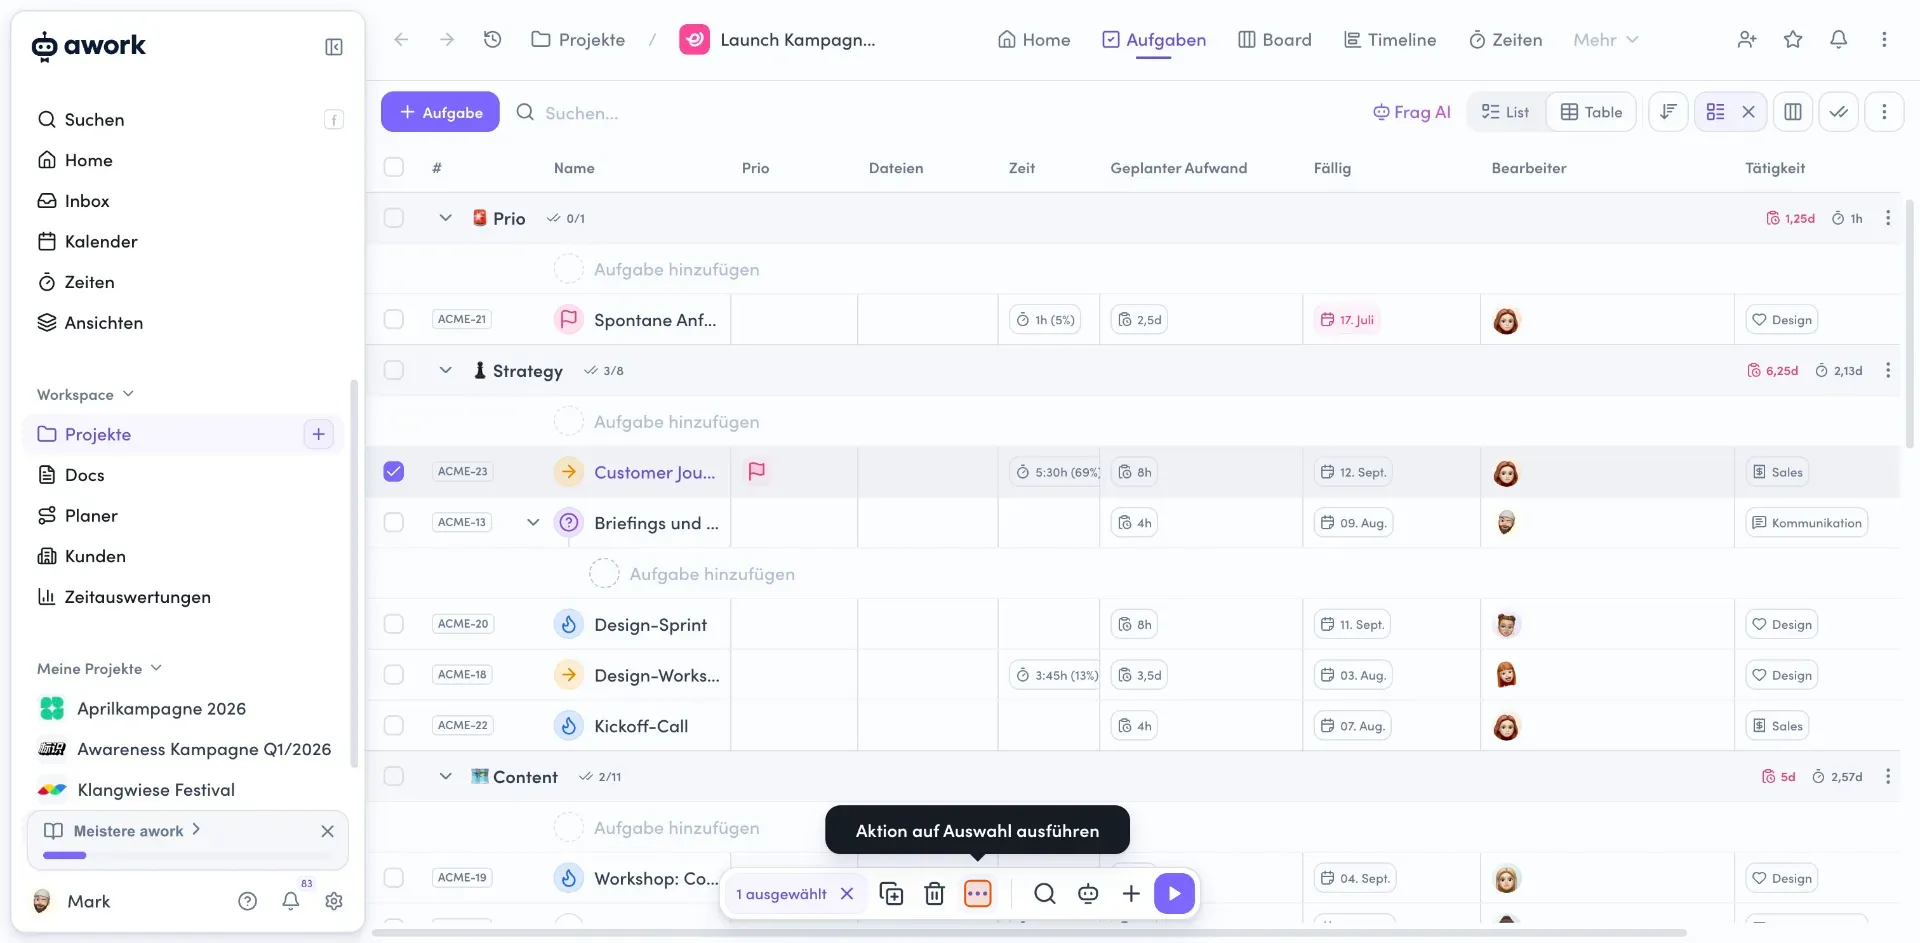
- Tags hinzufügen
- Aufgaben duplizieren
- Aufgabenliste ändern
- Projekt ändern
- Fälligkeit ändern
- Verschieben
- Prio setzen
- Status ändern
- Bearbeiter setzen/entfernen
- Tätigkeit ändern
- Unter Aufgabe verschieben
- Aufgaben löschen
The table view
You can switch any list to table view. You can choose which columns appear in the table, their order, and their width.
awork remembers the configuration for each list, so you can customize it for each project.
Configuring columns in table view
Selecting displayed columns
Click the columns icon in the toolbar to open the Spalten dropdown menu. Here, you'll see a list of all available columns. Click the checkbox next to a column to enable or disable it.
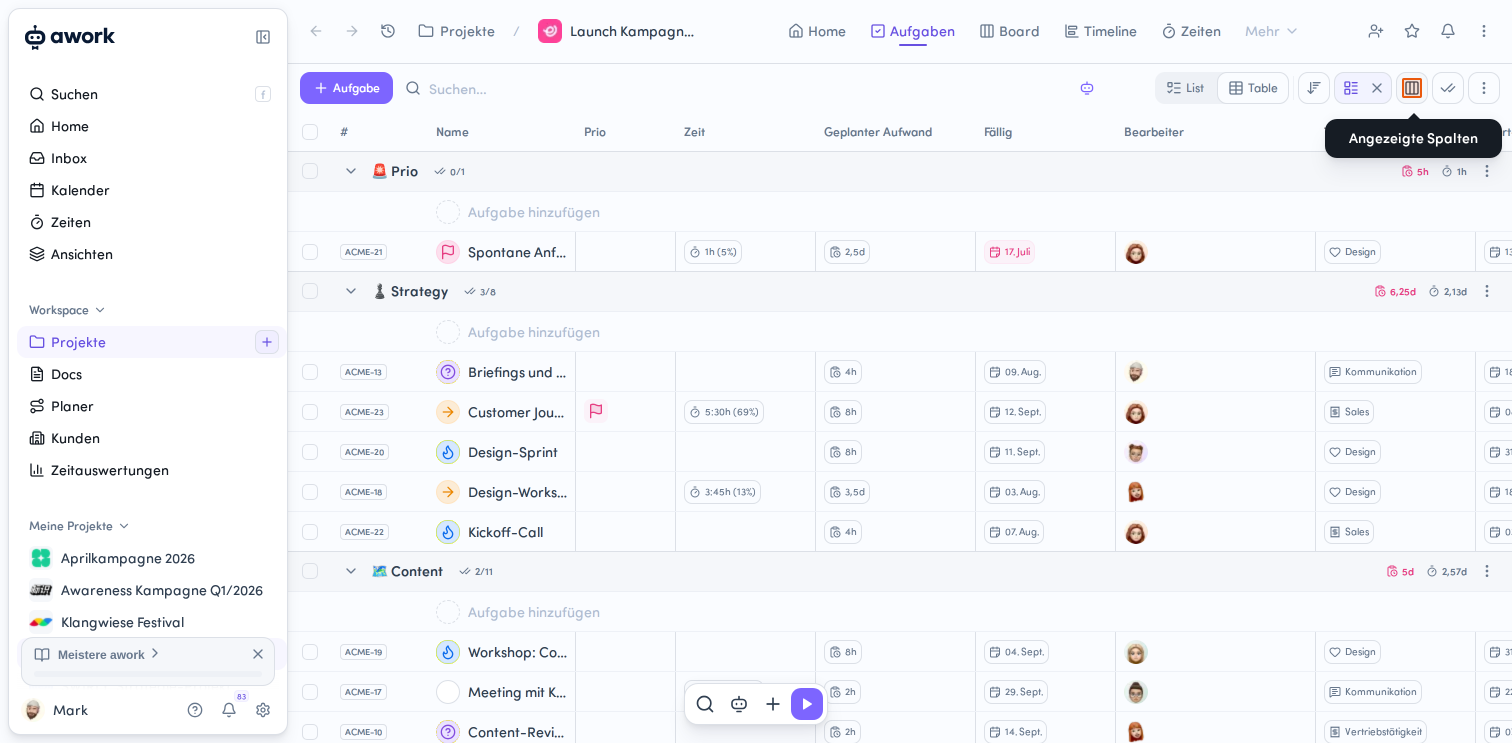
The Liste column is hidden by default. You can enable it here. It first shows the main list, followed by up to two additional lists. Any other lists are grouped under "+N". Hover over "+N" to see all the list names.
Adjusting column width
Drag the vertical divider between two column headings to change a column's width. The "Größe ändern" tooltip confirms the action.
Reordering columns
Drag and drop a column to move it to a new position. The "Zum Neuordnen ziehen und ablegen" tooltip indicates that the column is being moved.
Sorting columns in ascending or descending order
Click the up or down arrow next to a column heading to sort the column in ascending or descending order.
 Powered by happysupport.ai