
Configure Your Dashboard
Customize your awork dashboard by adding and arranging widgets like project lists, time tracking charts, and task overviews using edit mode
In this article, you'll learn how to personalize your awork dashboard by adding new widgets. Set up a customized dashboard with the widgets of your choice.


Customize Your Dashboard
-
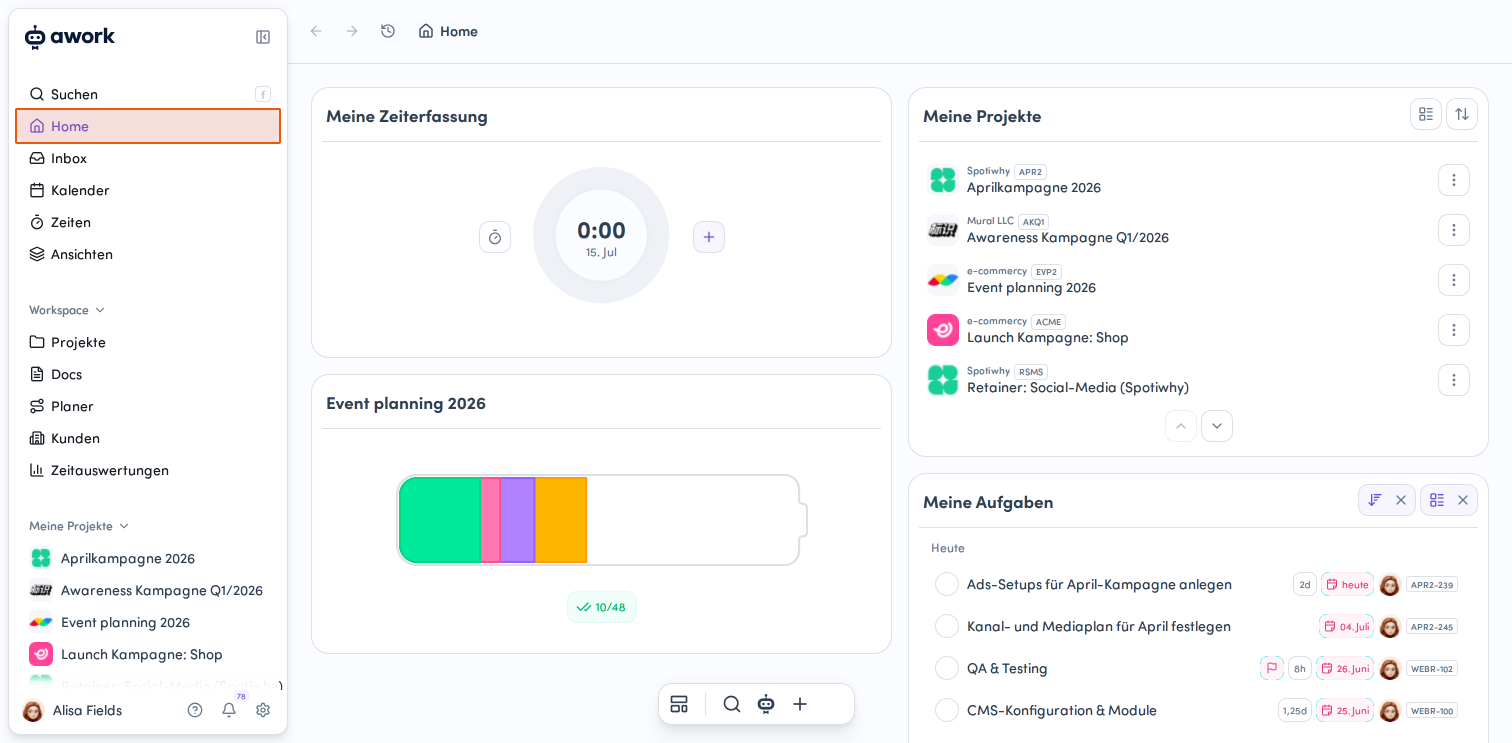
Navigate to the Home area
Click on Home in the left sidebar to go to your dashboard. You'll find this menu item right below the search field, and it displays a small house icon. -
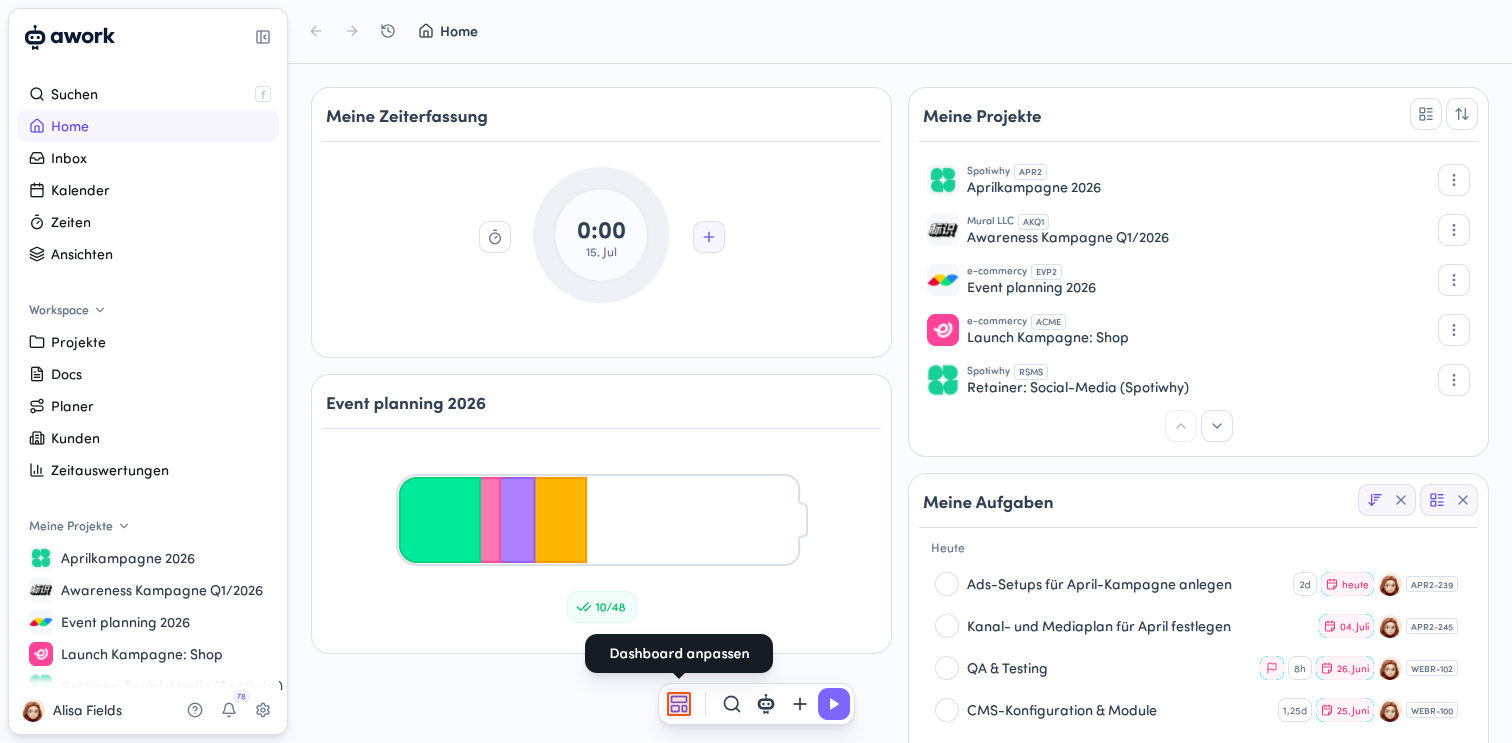
Open edit mode
At the bottom of your screen, you'll find a floating action bar. Click on the first button on the far left - when you hover your mouse over it, the tooltip Customize dashboard will appear.
Select Widgets
-
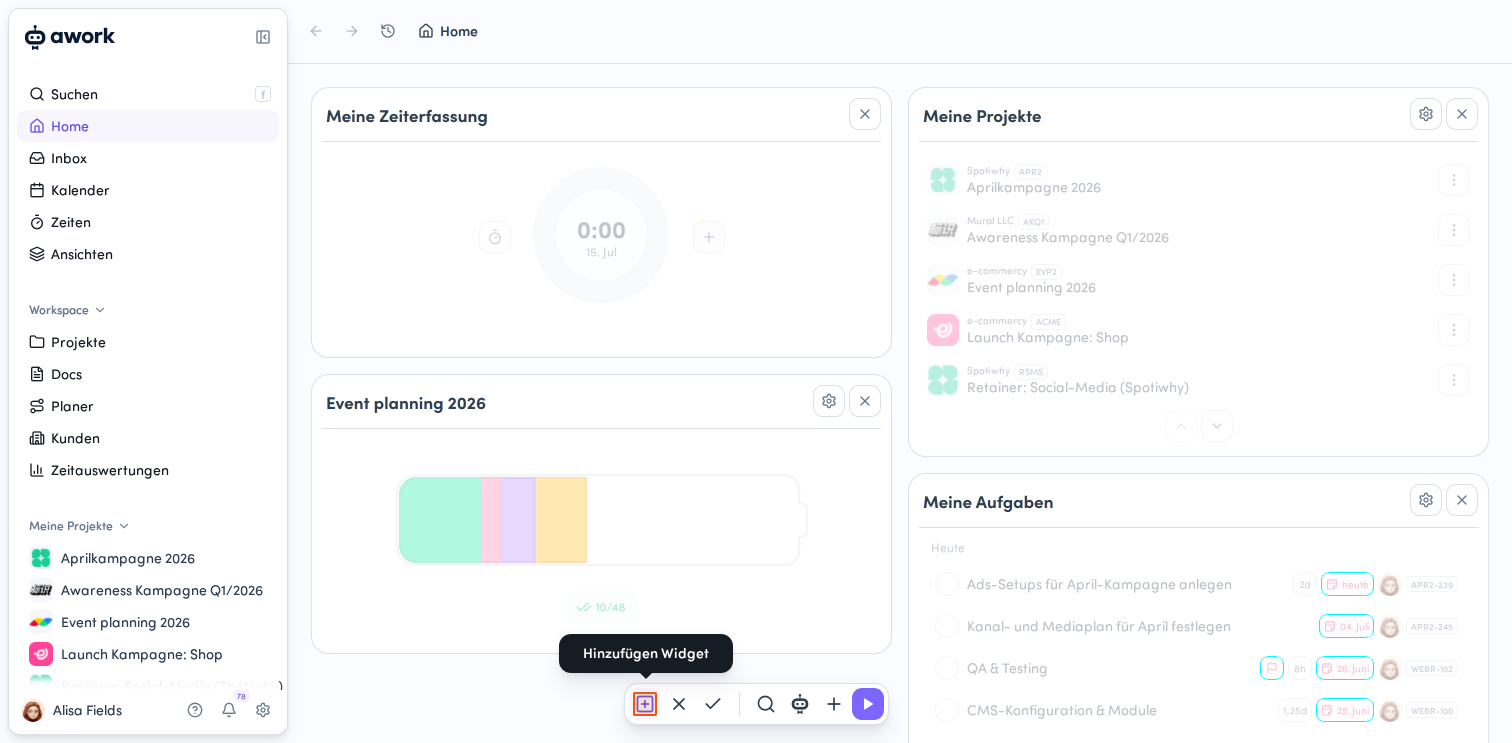
Add a widget
In the now-active editing bar, click on the + button on the left to add a widget. -
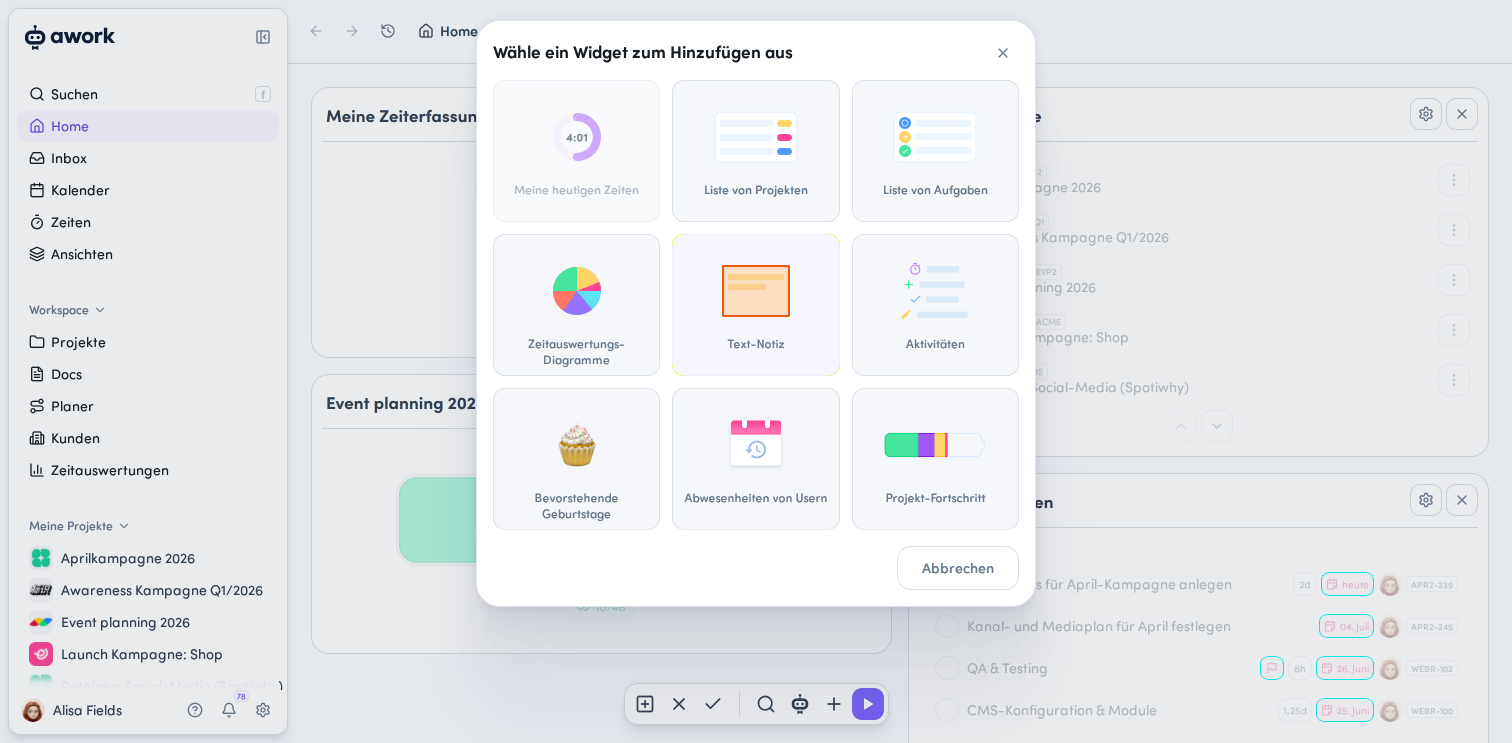
Choose a widget
A modal window will open with the title Select a widget to add. Here you'll see a grid with various widget options:- My today's times
- List of projects
- List of tasks
- Time tracking charts
- Text note
- Activities
- Upcoming birthdays
- User absences
- Project progress
Click on the widget you want to select it.

Save Changes
To apply your customizations, click on the Save button with the checkmark in the floating action bar at the bottom of your screen.

Edit Widgets
In edit mode, after clicking Customize dashboard, you can rename widgets by clicking on the title, move widgets around in the columns using drag and drop, adjust widget settings, or remove widgets.
-
Open widget settings
To edit a widget's settings, click on the gear icon in the top right corner of the widget. -
Save widget settings
In the Widget settings dialog that opens, you can change the widget's name and use the dropdown menu to change the selected data, for example Displayed project or Displayed tasks. Click the Save button to apply your changes. Click Cancel to close the window without saving. -
To apply your customizations, click on the Save button with the checkmark in the floating action bar at the bottom of your screen.
Remove a Widget from Your Dashboard
To remove a widget, click on the X icon in the top right corner of the widget. The tooltip Remove widget confirms that clicking this will delete the widget from your dashboard.
To apply your customizations, click on the Save button with the checkmark in the floating action bar at the bottom of your screen.
Discard Changes
If you don't want to apply your changes, click on the X icon with the tooltip Cancel in the floating action bar at the bottom of your screen. All changes you made will be discarded and your dashboard will return to its previous state.
All Widgets Explained
My Today's Times
This widget shows you all the times you've logged today. The circular progress indicator fills up based on your weekly working hours divided by five days (40h / 5 = 8h).
You can log a new time using the + button next to the progress indicator, and you can access the Times menu by clicking the stopwatch icon.
If you've already logged times for today, you can use the action buttons on the right to restart the timer with the same time tracking details.
List of Projects
By default, this shows all projects where you're part of the project team and that are currently running (yellow status). If your workspace has fewer than three projects, inactive projects will also be displayed here. You can also choose a previously saved project filter or create a new one. Click on the widget title to navigate to the project overview.
Group your projects
Click on the button with the list icon in the top right corner. A dropdown menu will open with various grouping options: Project status, Project status type, Client, Project type, Responsible person, Due week, Due month, or Workflow.
Sort your projects
Click on the sort button with the up and down arrows in the top right corner of the widget. The dropdown menu will show the sorting options. You can sort in ascending or descending order by End date, Start date, Created on, Name, Client, Workflow, Budget, Tasks, Progress, or Status.
List of Tasks
By default, this shows all your open tasks from running projects. You can choose whether you want to show completed tasks. To do this, click on the icon with the double checkmarks. In addition to the default view, you can also select a previously saved task filter or create a new one.
Group your tasks
Click on the button with the list icon in the top right corner. A dropdown menu will open with various grouping options: Project, Project type, Client, Activity, User, By day, By week, or By month.
Sort your tasks
Click on the sort button with the up and down arrows in the top right corner of the widget. The dropdown menu will show the sorting options. You can sort in ascending or descending order by Task name, Activity, Start date, Due date, Creation date, Planned effort, Task status, or User.
When you hover your mouse over a task, the project key will be displayed.
To reset the grouping in the project or task widget, click on Remove sorting in the sort dropdown or Remove grouping in the grouping dropdown.
Time Tracking Charts
With this widget, you can display charts from time tracking reports on your dashboard. When adding the widget, simply select the corresponding report. You can switch between matrix and pie chart using the chart button in the top right.
Text Note
Here you can freely add notes. You can quickly create additional notes using the + button at the end of the note.
Activities
This widget shows you activities from all running projects where you're on the project team or have enabled notifications. Activities are grouped by day and project. The display is limited to activities from the past seven days.
Upcoming Birthdays
This shows the upcoming birthdays of users visible to you.
User Absences
This widget displays the absences of other users that were entered in the Workload overview. Jump to today's date, Navigate to earlier dates, or Navigate to later dates. Click on the widget title to go directly to the Workload overview.
In edit mode, click on the gear icon in the top right corner to select whose absences should be displayed:
- All users - Show absences for all users in your workspace
- Select team - Show absences only for selected teams (click on Select teams to open the team selection dialog)
For example, you can set up the absence widget so that your users only see absences from their own team. To do this, the Only users from own teams button must be enabled in the Users section of the General permission role via Rights management.
🔐 The absence widget is available from the Professional plan onwards.
Project Progress
For this widget, you can select a project, which will be displayed as a battery showing the proportion of tasks in their respective status (color).
The numbers below the battery represent the ratio of completed tasks (green) to all tasks in the project.
Adjust Widget Size
Using the arrow icons at the end of some widgets, you can adjust the number of entries displayed in the list. awork remembers your preferred widget size, so you'll find the same settings the next time you reload.
FAQ
How can I customize my dashboard?
You can customize your dashboard by navigating to Home and clicking on the first button on the far left in the floating action bar at the bottom of your screen. Edit mode is now active.
Where can I find the widgets I can add?
The widgets are available in a modal window that you can open by clicking on + Add in the floating action bar at the bottom of your screen.
Can I remove widgets from my dashboard?
Yes, you can remove widgets by clicking on the X icon in the top right corner of the widget while in edit mode.
What happens if I don't want to save my changes?
If you don't want to save your changes, click on the X icon with the tooltip Cancel in the floating action bar at the bottom of your screen.
How can I adjust the size of widgets?
You can adjust the size of widgets by using the arrow icons at the bottom of some widgets.
 Powered by happysupport.ai