
MCP Connectors for AI Agents
Connect your AI agents to external applications using MCP connectors from the catalog or custom Model Context Protocol configurations.
In this article, you'll learn how to set up connectors for AI agents to expand their capabilities. You'll discover how to add pre-configured connectors from the catalog and how to configure your own MCP connectors (Model Context Protocol) to connect your agents with external applications.
Key Benefits and Use Cases
Connectors give agents access to tools and services. Connections determine which authenticated account the agent uses.
- awork provides pre-defined connectors.
- Additionally, you can create your own connectors using the MCP protocol.
Connectors vs. Connections
- A connector defines the external service and the technical access to it
- A connection is a specifically set up and authenticated account for that service
A connector can have multiple connections.
When multiple connections are available, a selector is displayed. This lets you choose which connection the agent should use.
Managing Connectors in the Library
- Open the Library
- via Settings (gear icon in the bottom left of the main menu) > Library
- or open the AI section in the main menu on the left and click the Library button in the top right
- Navigate to the Connectors section
In the Library, you'll see a navigation menu on the left with sections for Agents, Skills, and Connectors. Select Connectors to go to the overview of available connections.
Install a New Connector
- Click on + Connector below the search field.
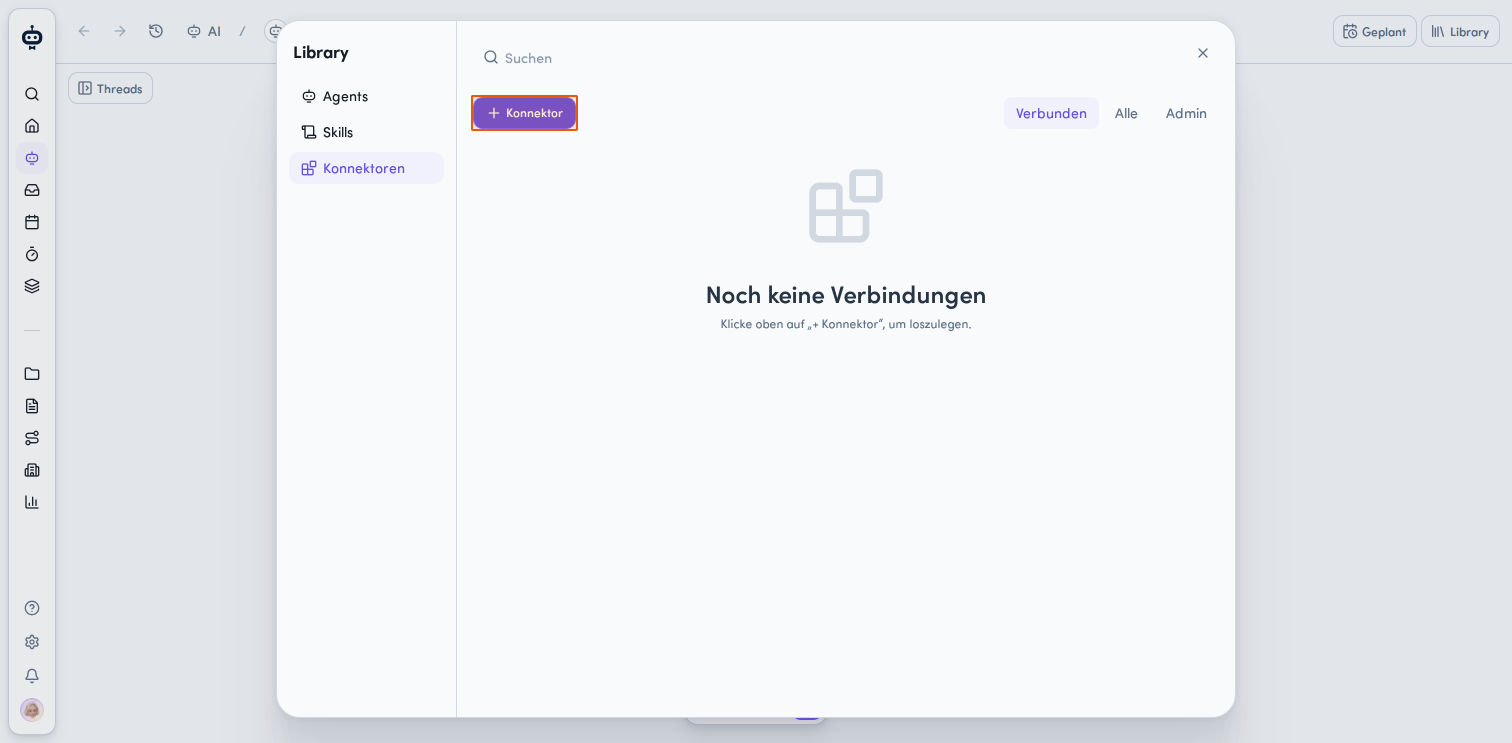
- Click on the Install New tile to open the connector catalog.
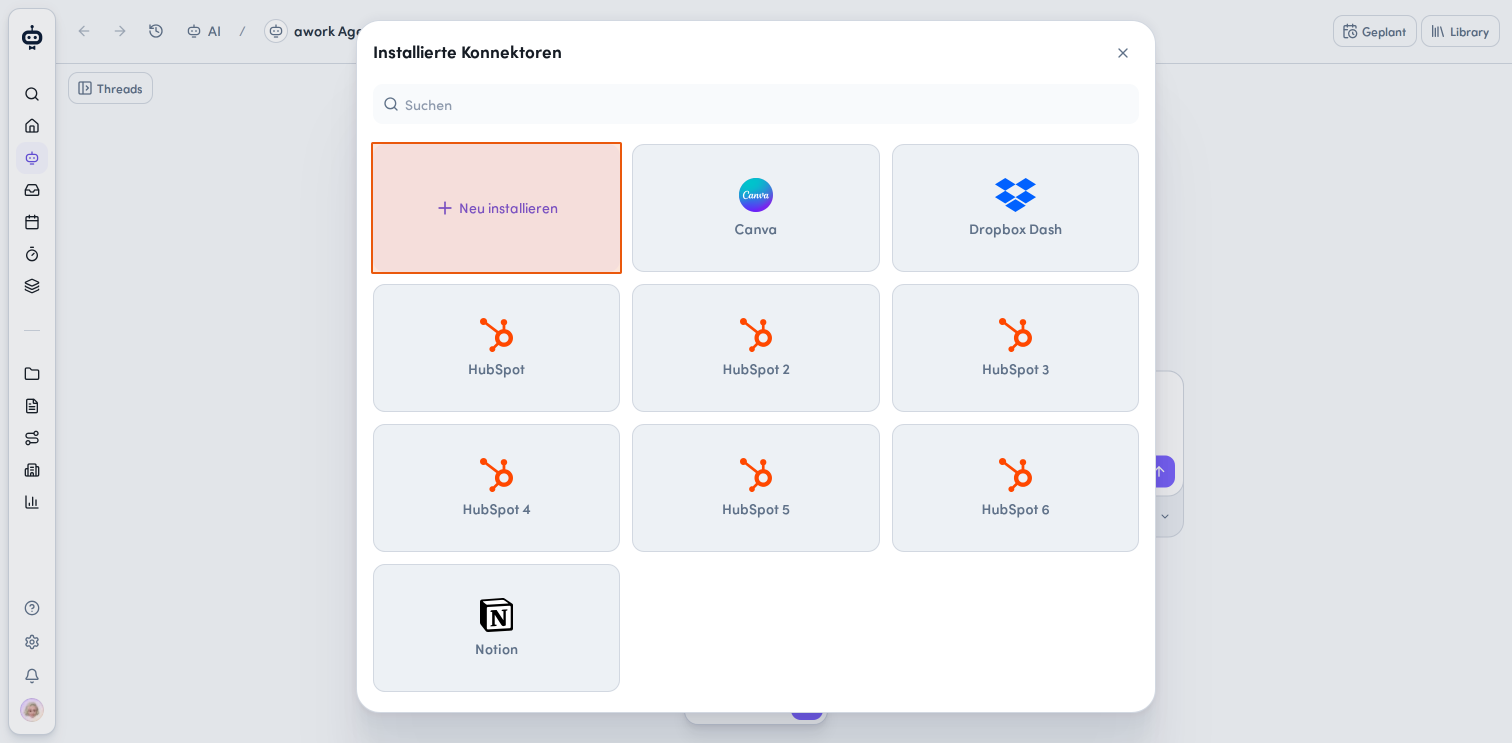
- Install Connector from the Catalog
A modal with the connector catalog will open. The catalog shows all available connectors in a grid view. A search field is available at the top. Select the connector you want from the overview. - Configure Connector Details
After selection, a form appears with the following fields:- Connector Name: The name for the connection
- Description: An explanation of what the connector provides
- For connectors that require OAuth, additional fields will be displayed. Configure the OAuth app with the provider and then add the client credentials here:
- OAuth Client ID: The client ID from the provider
- OAuth Client Secret: The associated secret
- Redirect URL: The callback URL for authentication in the provider's app.
- A link to the OAuth Setup Guide helps you with the configuration.
- Save Connector
Click Save to create the connector. Use Cancel to discard changes, and Back takes you back to the catalog selection. - Allow Access
The first person in the workspace to add a connector of this type sets up the first connector and automatically creates their own connection. After that, the connector becomes available to other users who can set up their own connections for it.
💡 The connector is set up once in the workspace and appears in the list of Installed Connectors. After that, other users can set up their own connection for it.
Display Connected Connectors
Use the Connected tab in the top right of the Library to display only the connectors you've already connected.
Create Your Own MCP Connector
If a required service isn't in the pre-configured catalog, you can set up your own connector using the MCP protocol.
- In the Connectors section, click + Connector below the search field.
- In the Installed Connectors modal, click the + Install New button.
- In the connector catalog, click on the Set Up Custom Connector tile.
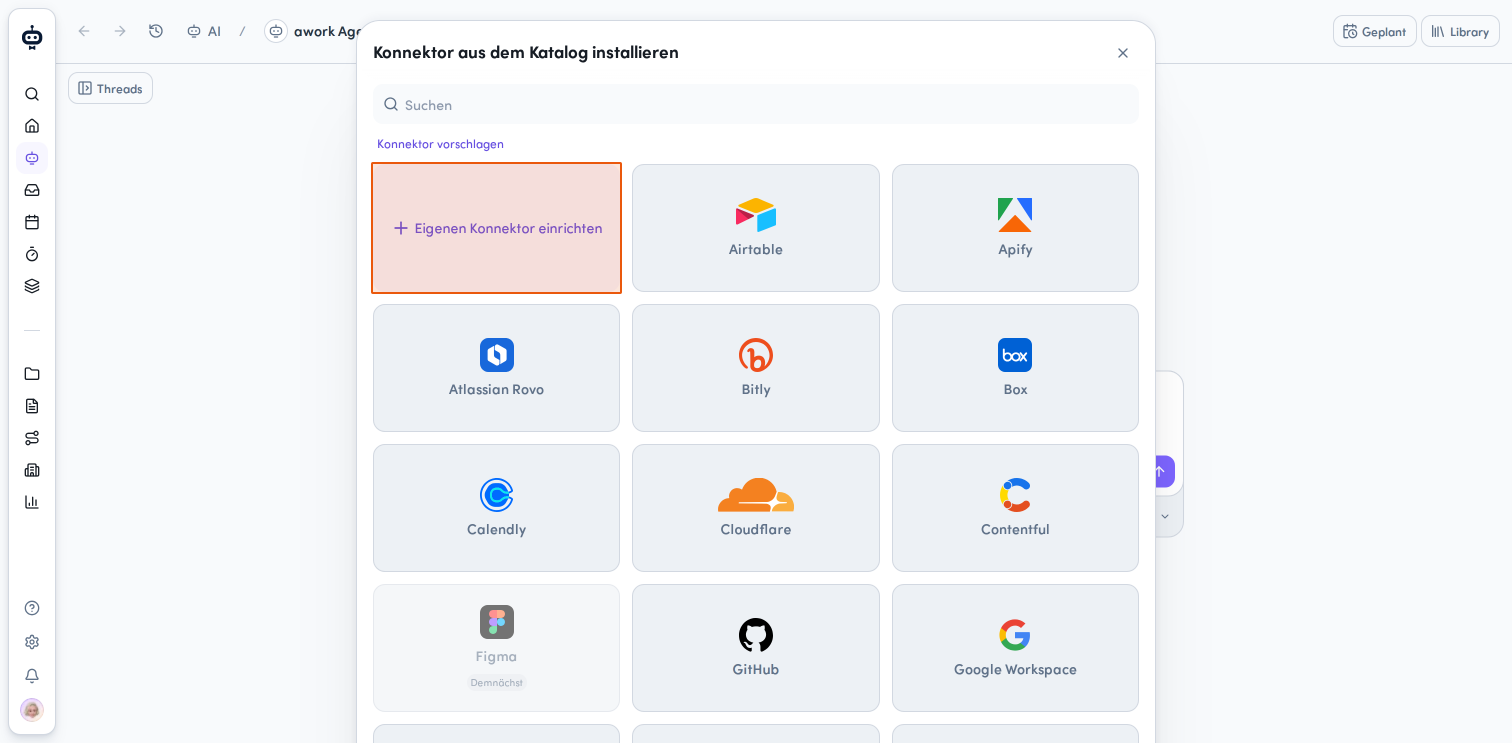
- Configure MCP Connector
Fill in the following fields:
- Connector Name: A meaningful name for the external application
- Description: Explain what the application provides and when it should be used
- MCP Server URL: The URL of the MCP server (e.g. https://example.com/mcp)
- Set Workspace Availability
Check the Make this connector available for the workspace checkbox if all team members should have access to this connector.
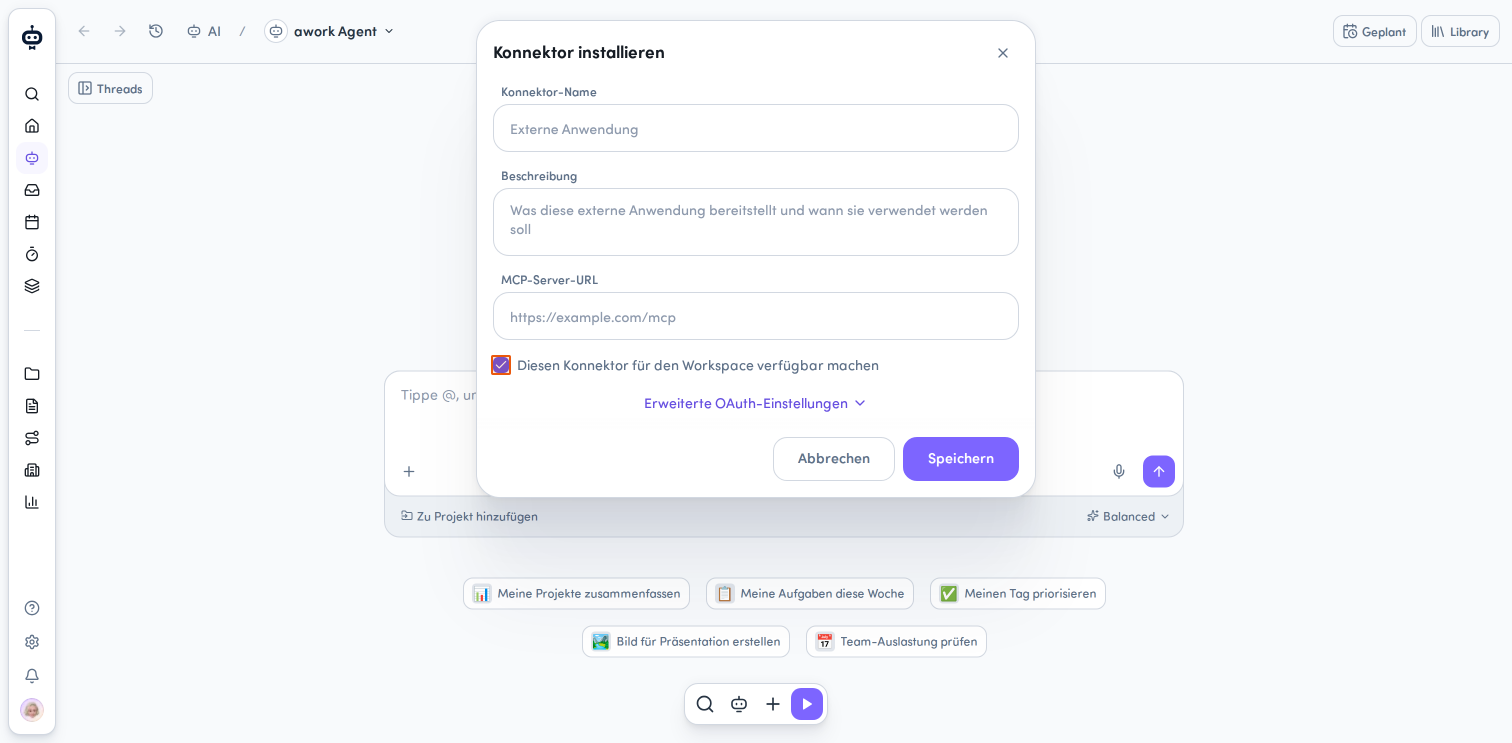
- Advanced OAuth Settings (optional)
Use the dropdown arrow to configure additional authentication options if needed. Set up the OAuth app with the provider and then add the client credentials here. Enter the listed redirect URL in the provider's app.
This allows you to connect internal systems or services that aren't included in the pre-configured awork connector catalog.
Custom connectors set up by other users are displayed in the Installed Connectors modal. You can use such a server and connect it with your personal authentication if needed.
Suggest a New Connector
In the connector catalog, you'll find a Suggest Connector link below the search field. Tell us the name of the tool you'd like to use, and optionally the website and link to the MCP Server Documentation of the tool.
Managing Connections
For one connector, multiple authenticated accounts can be available.
Add Connections
There are several ways to add your own connections for a connector.
-
Initially when installing a connector.
-
Click the + Connector button in the Library and select the connector from the list of Installed Connectors.
-
Navigate to the All tab in the Connectors section of the Library. You'll see all already installed connectors. Click the Connect button.
-
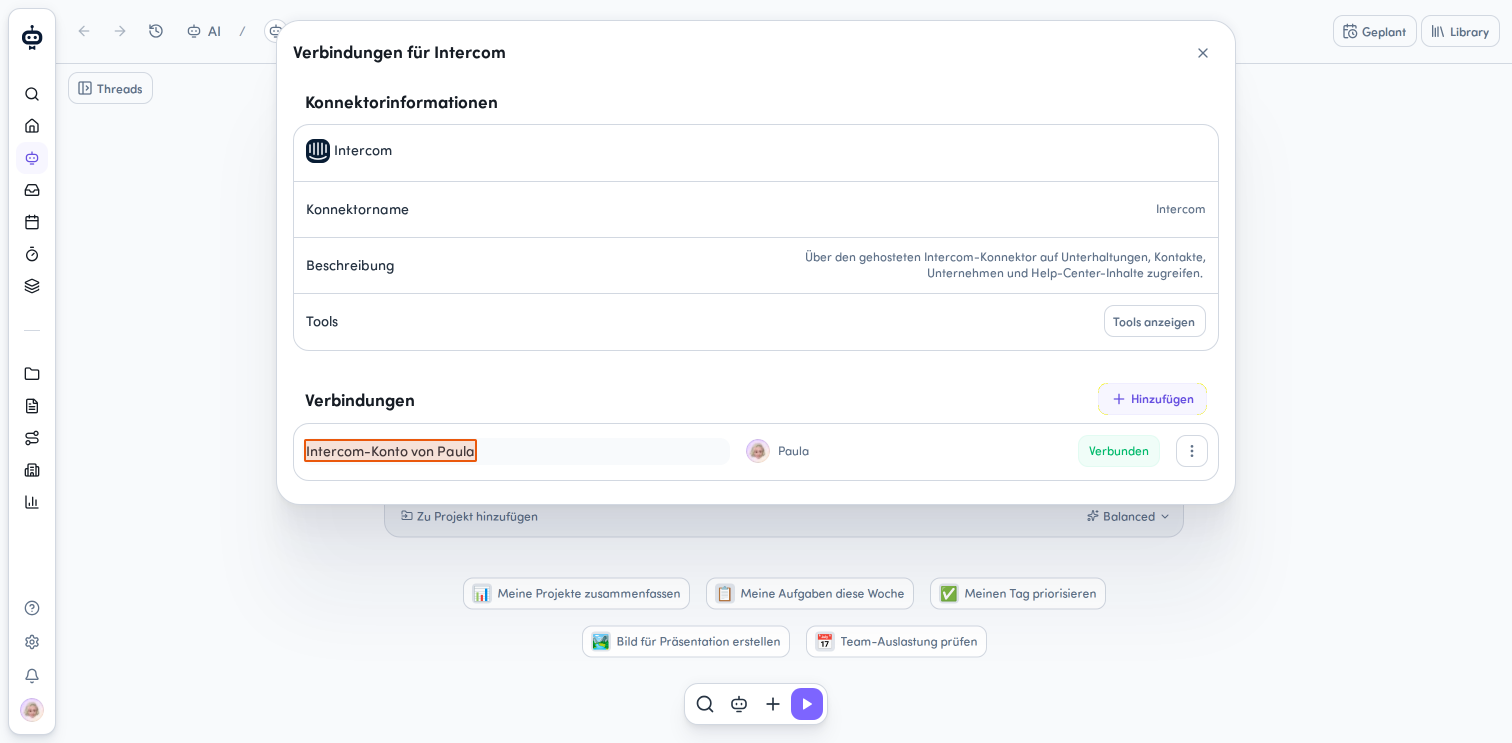
For an already installed connector, open the Action Menu and select Manage Connections, then click the + Add button in the Connections section.
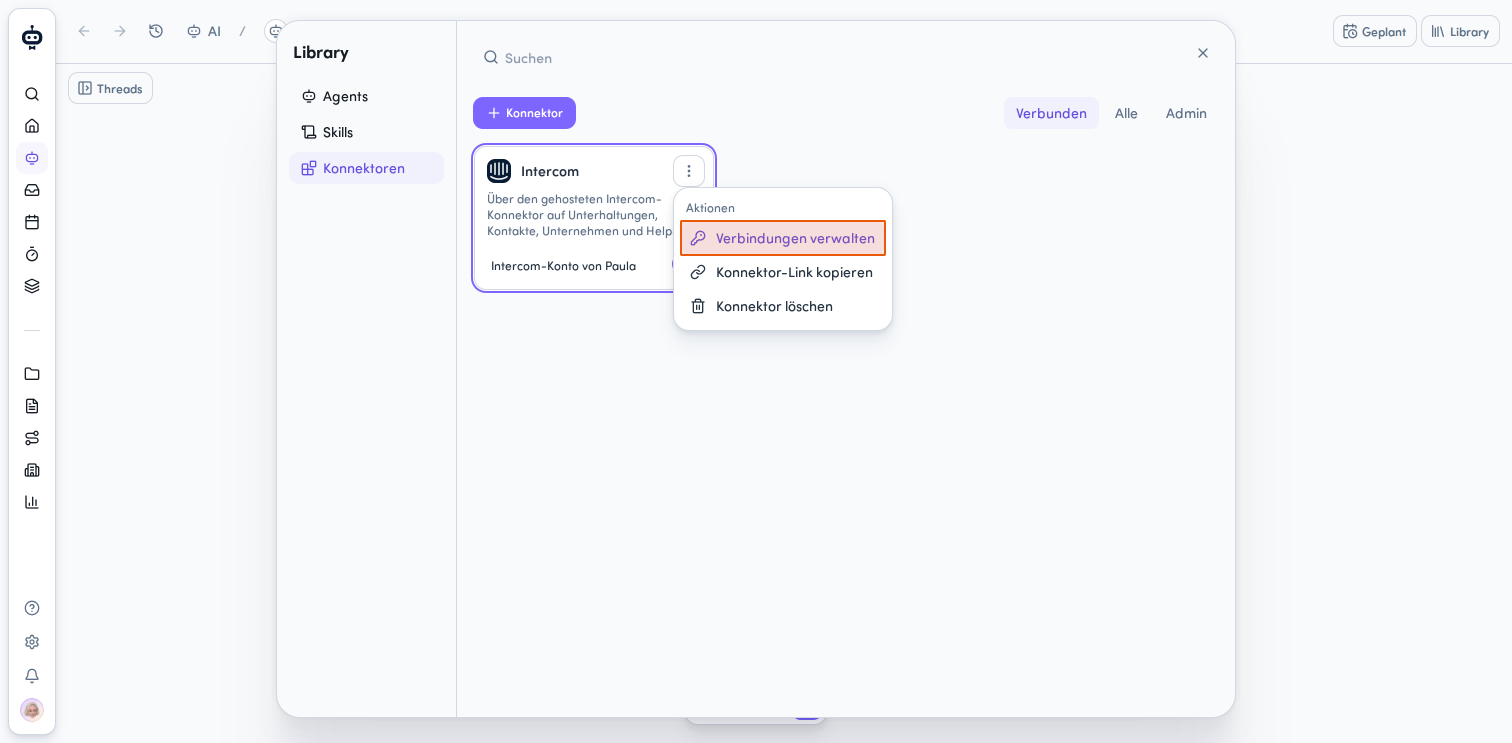
A connection can be renamed. To do this, click directly on the line of a connection ("User's Account").
Once multiple connections exist, a selector will be displayed on the connector card. This lets you choose which connection the agent should use.
Share a Connection
Connectors can be shared with other users if the appropriate global permissions exist.
Authenticated connections can also be shared with team members.
When sharing, the original authentication secrets are not revealed. Instead, the connection is made accessible to other users according to the sharing method chosen.
- For the desired connector, open the Action Menu and select Manage Connections.
- In the Connections section, click the Action Menu.
- Select Share Connection.
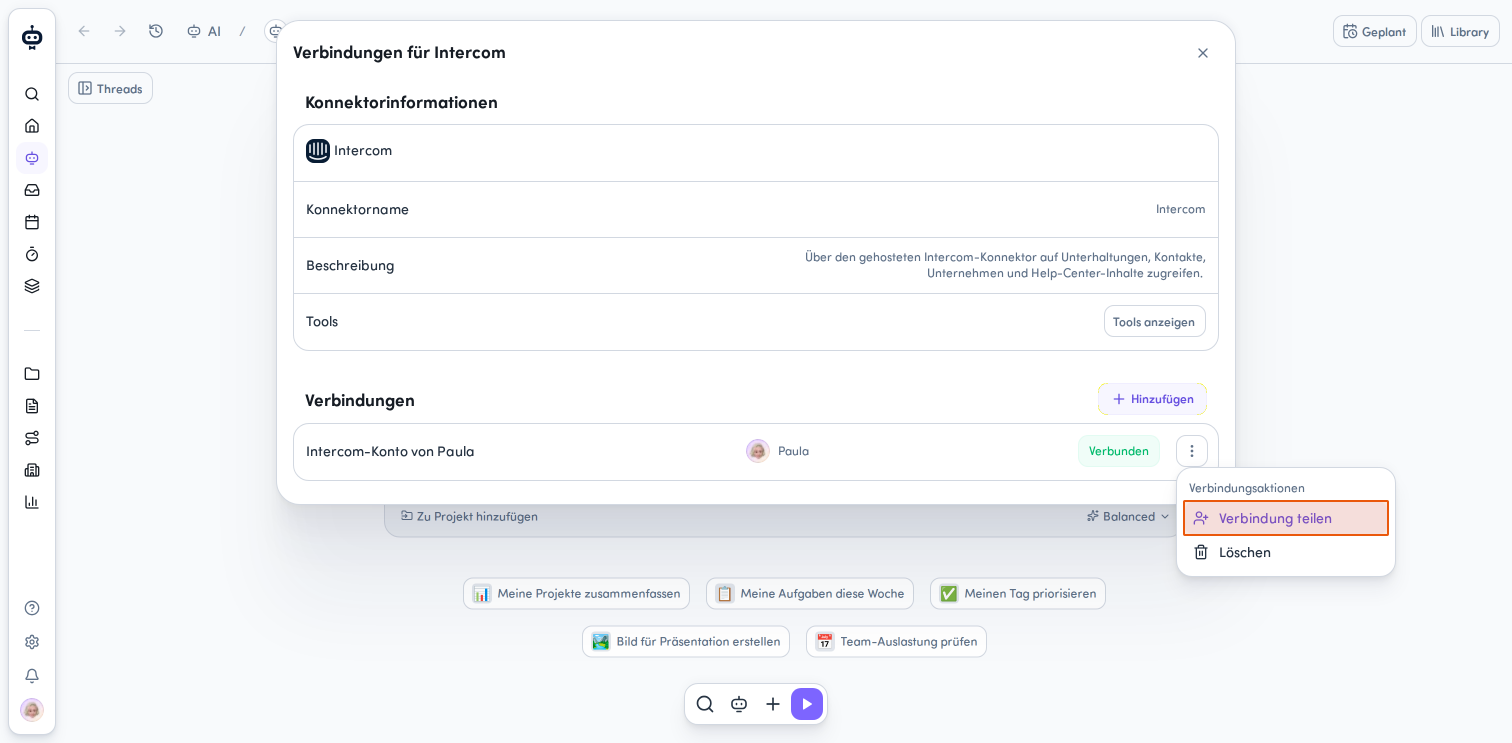
In the sharing dialog, you can set who has access to the skill:
- General Access: Specify whether and how your organization can access the connection. Choose between None or Read for access rights.
- Individual Access: Click Add User or Team to add individual users or teams.
The shared connection will then also appear in the Library of the respective users.
Shared connections are especially useful when multiple team members need to use the same account.
This way, team members can use an existing connection without having to set it up themselves, if no separate account or authentication is required.
Delete a Connection
- For the desired connector, open the Action Menu.
- Select Delete Connection.
Enable and Disable Connectors for Agent Access
An enabled connector expands the content or capabilities available to the agent.
You can enable a connector directly on the connector card in the Library for agents in general. Use the toggle switch:
- Active: The connector can be used by agents.
- Disabled: Agents can't connect to the external tool via the connector. You can enable the connector if needed for a specific run. If a required connection is missing, a notice will be displayed on the respective connector.
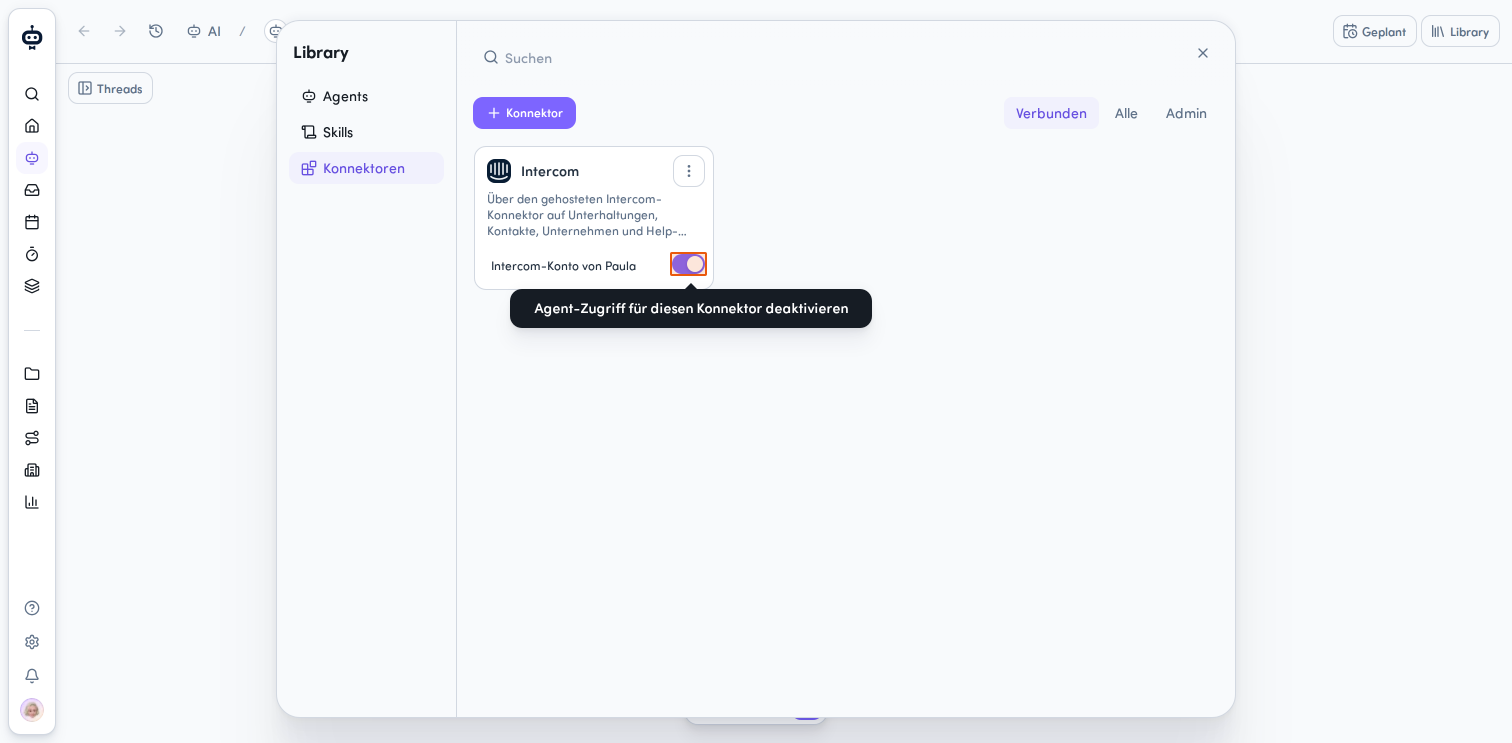
Add Connector Directly to an Agent
- Switch to the Agents section in the Library.
- Click Details on an agent to open the agent details.
- In the Connectors section within the agent details, click the Add button. A dropdown menu opens with two options:
- Add Existing Connector: Select an already configured connector. Use the search field or the Active and All filters to find and add the desired connector.
- Create New Connector: Set up a new connector directly.
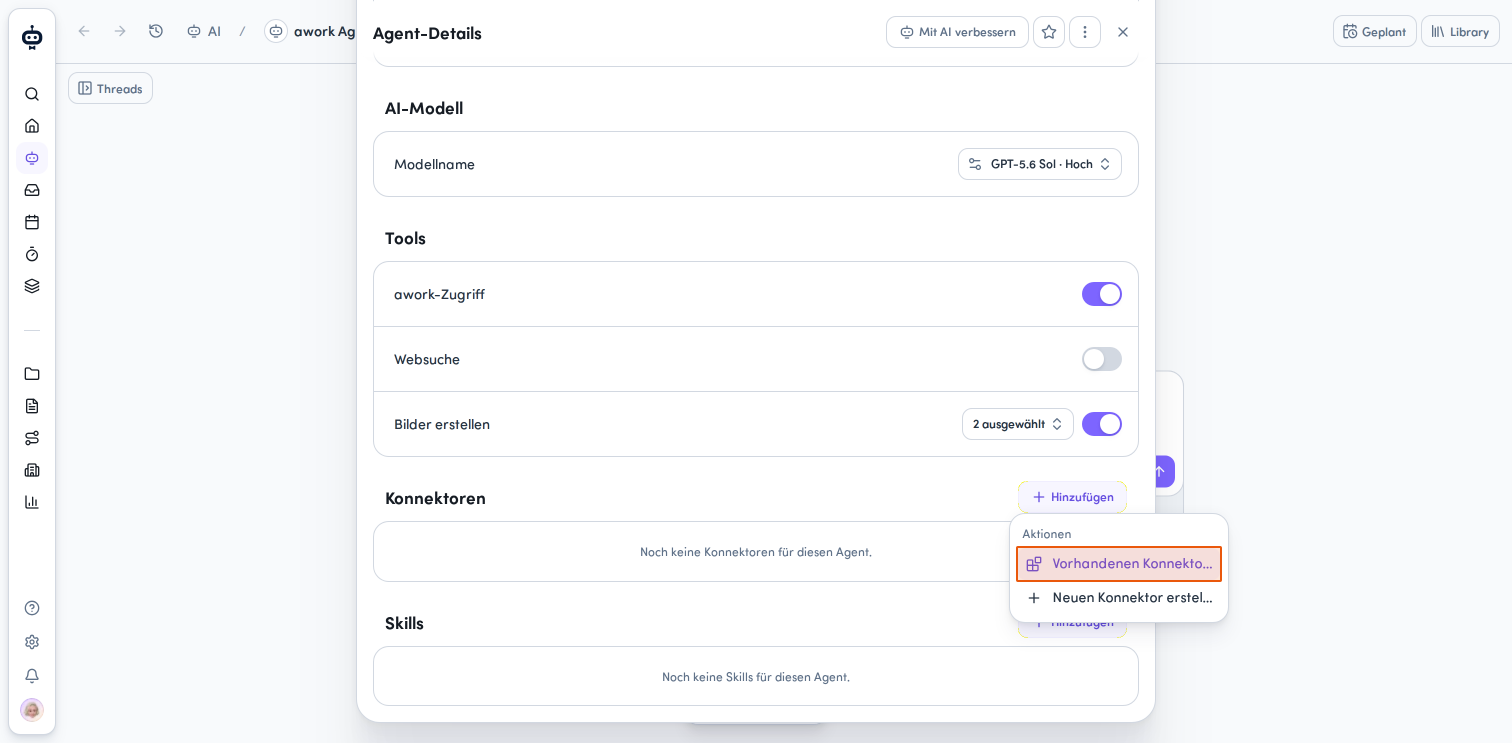
The agent can now use the connector.
Define Connection Settings
Use the selection menu to specify whether an existing connection should be used (> Assign Connection) or each user needs to authenticate themselves (> Each User Signs In).
Once an agent is selected for the AI chat, you can see the available connectors by clicking on + Connectors.
A distinction is made between:
- Active Connectors: The agent currently uses these
- Disabled Connectors: You can enable these if needed
If you open the Library from here, the agent's configuration is already applied and you'll see the elements enabled for the connector.
Managing Connectors as Admin
-
Use the Admin View
Switch to the Admin filter in the Library to see an overview of all connectors with management options. Here you'll see for each connector the number of connections (with key icon) and the installation date. -
Execute Connector Actions
Click on the action menu of a connector to display the available actions:- Manage Connections: Opens the connection management
- Delete: Removes the connector
Troubleshooting and Notes
- Typos During Connector Setup: If incorrect credentials are used or typos are made during the initial setup of a connector, you must delete the connector and create it again. The credentials cannot be changed.
- Admins Can't Access All Connectors: Currently, administrators can't see and manage all connectors. This capability will be added in the future.
FAQ
What is a Connector?
A connector establishes the connection to an external service and defines the technical access to it.
What is a Connection?
A connection is a specifically set up and authenticated account for a connector.
Can a Connector Have Multiple Connections?
Yes. Multiple authenticated accounts can be available for a connector. You can use the selector to choose which connection the agent should use.
Can Connections Be Shared with Team Members?
Yes. An authenticated connection can be shared with other users. The shared connection will then also appear in their Library.
Are Credentials Visible When Sharing?
No. The original authentication secrets are not revealed when sharing.
Can I Connect a Service that awork Doesn't Offer as a Connector?
Yes. You can create your own connector using the MCP protocol.
Can an Agent Use a Shared Connection?
Yes. An agent can use a shared connection without the respective user having to set up their own authentication.
 Powered by happysupport.ai